Bottomhole Assembly Design – How Drillers Build a BHA

Two wells can use the same rig, the same bit and the same mud, and still behave completely differently. One drills straight and fast. The other wanders, vibrates and gets stuck. Very often, the difference is the few hundred feet of tools just above the bit. That section is the bottomhole assembly, and putting it together well is part science and part craft. So how do drillers and engineers approach bottomhole assembly design?
Bottomhole assembly design means choosing and arranging the bit, collars, stabilizers, steering and measurement tools at the bottom of the drill string so the well drills where it should, as efficiently and safely as possible. Engineers start by defining the goal for the hole section, such as holding a vertical hole or building angle, then select tools that meet it. Drill collar weight is sized so the bit gets enough weight while the drill pipe above stays in tension. Stabilizer placement controls whether the assembly builds, drops or holds angle, using classic layouts called fulcrum, pendulum and packed assemblies.
Modern wells often add a mud motor or rotary steerable system plus MWD tools for active steering. Even then, the same basic principles of weight and stabilizer placement still shape how the assembly behaves.
What Is a BHA?
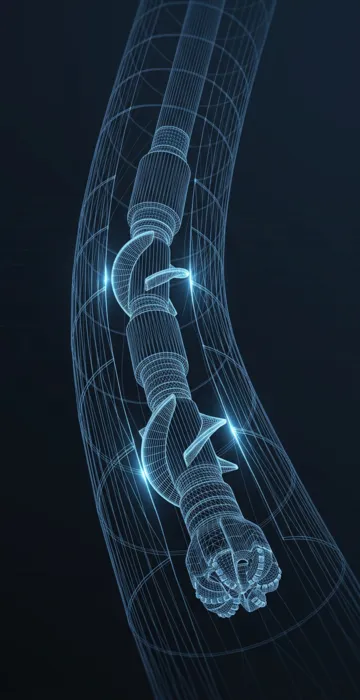
A BHA, or bottomhole assembly, is the lower part of the drill string, from the bit up to the drill pipe. The SLB glossary defines the bottomhole assembly the same way and lists its usual pieces: bit, collars, stabilizers and other downhole tools.
Think of the BHA as the business end of a very long pencil. The drill pipe is the long, flexible shaft you hold from far away. The BHA is the short, stiff part near the tip that determines how cleanly and accurately the line gets drawn.
What Are the Goals of Bottomhole Assembly Design?
A good BHA balances several goals at once, and some of them pull against each other. Here are the ones engineers usually weigh:
- Deliver enough weight on bit to drill efficiently.
- Control the well's direction, whether that means holding, building or dropping angle.
- Carry the measurement tools needed for surveys and formation data.
- Keep vibration under control to protect the bit and tools.
- Reduce the risk of stuck pipe and make the assembly "fishable" if something goes wrong.
- Allow enough flow area for the mud to clean the hole without excess pressure loss.
The principle is simple. There's no perfect BHA, only a best compromise for a given hole section. A stiff, heavily stabilized assembly holds direction beautifully but can be harder to free if it sticks. A slick assembly is easy to run but harder to control.
What Are the Main BHA Components?
Most assemblies are built from the same basic toolbox. The design work is in choosing which pieces to use and where they go.
| Component | Role in the design |
|---|---|
| Bit | Matched to the rock and the steering method |
| Mud motor or rotary steerable | Provides bit rotation and active steering |
| Stabilizers | Act as contact points that control bending and direction |
| Drill collars | Supply weight and stiffness |
| MWD and LWD | Measure direction and formation data |
| Jar | Frees the string if it gets stuck |
| Heavyweight drill pipe | Transition to drill pipe, extra weight in high-angle wells |
| Subs | Connect different threads and hold float valves |
The weight side of the design leans heavily on drill collars, so it's worth understanding how they work if you're new to this.
How Do Stabilizers Control the Well's Angle?
Stabilizers control angle by deciding where the BHA touches the hole wall. Between those contact points, the collars bend under their own weight and the weight on bit. That bending tilts the bit slightly up or down, and the hole follows.
Picture a long, heavy steel bar resting in a tilted pipe. Support it at one point near the end, and the part beyond that point sags. Support it at several close points, and it stays stiff and straight. That's exactly the physics engineers use.
Fulcrum (Building) Assembly
A fulcrum assembly builds angle. It has a stabilizer right above the bit (the near-bit stabilizer) and the next stabilizer much farther up, or none at all. When weight is applied, the flexible collars above the near-bit stabilizer bow toward the low side of the hole. The near-bit stabilizer acts like a fulcrum, levering the bit toward the high side so inclination increases.
Pendulum (Dropping) Assembly
A pendulum assembly drops angle. There's no near-bit stabilizer. Instead, the first stabilizer sits some distance up the collars. The unsupported section below hangs like a pendulum, and gravity pulls the bit toward the low side of the hole, bringing the well back toward vertical.
Packed (Holding) Assembly
A packed assembly holds angle. It uses several stabilizers placed close together near the bit, often three or more within the first few joints. That stiff section resists bending, so the bit keeps drilling in the same direction. Packed assemblies are a classic choice for tangent sections and for wells that need to stay straight in formations that tend to push the bit around.
Pendulum vs. Packed Assembly: How Do You Choose?
You choose based on what the hole needs to do next. If the well has drifted off vertical and needs to come back, a pendulum helps it drop. If the inclination is right and needs to stay that way, a packed assembly holds it.
| Assembly | Stabilizer layout | Effect on angle |
|---|---|---|
| Fulcrum | Near-bit stabilizer, next one far above | Builds |
| Pendulum | No near-bit, first stabilizer higher up | Drops |
| Packed | Several stabilizers close to the bit | Holds |
Weight on bit adjusts the effect. More weight usually strengthens a fulcrum's build and weakens a pendulum's drop. Real results also depend on formation dip, hole size and bit type, so offset well data is very valuable.
How Do Steerable Assemblies Change BHA Design?
Steerable assemblies add a tool that can change direction on command. A mud motor with a bent housing steers by sliding, and a rotary steerable system steers while rotating. With either one, you're less dependent on stabilizer placement alone, though stabilizers still shape how the assembly responds.
These assemblies also add an MWD tool in nonmagnetic collars just above the steering tool. The directional driller reads toolface and survey data from it to decide when and how much to steer. Learn more about the methods in this Rigzone overview of how directional drilling works.
How Is Collar Weight Calculated for a BHA?
Collar weight is sized so the BHA can supply the planned weight on bit with the drill pipe still in tension. Here's the basic logic, step by step:
- Pick the maximum weight on bit you expect to use.
- Correct for buoyancy, because the mud partly floats the steel. A common estimate of the buoyancy factor is 1 minus the mud weight divided by the weight of steel (about 65.5 pounds per gallon).
- In a deviated hole, correct for inclination, since only part of the BHA's weight acts along the hole.
- Add a safety margin so the neutral point stays inside the collars or heavyweight pipe.
- Divide by the collar's weight per foot to get the length needed.
In high-angle and horizontal wells, collars lying on the low side add drag without adding much useful weight. That's why designs there often move weight higher up the string, into heavyweight drill pipe in the vertical or near-vertical section.
What Other Details Matter in BHA Design?
A few details separate a good design from a troublesome one:
- Jar placement: the jar should sit clear of the neutral point and above the tools most likely to stick.
- Stiffness transitions: big jumps in stiffness between components concentrate bending stress and invite fatigue cracks.
- Fishability: every component's outside diameter and length should be known, so a fishing tool can catch it if needed.
- Hydraulics: motors, MWD tools and bit nozzles all take pressure, and the pumps need enough left over to clean the hole.
- Vibration: some combinations of bit, stabilizers and rotary speed set up harmful vibration, so shock tools or changes in parameters may be needed.
Bottomhole Assembly Design: Building the Right Tip on the Pencil
Bottomhole assembly design is the work of choosing and arranging tools so the bit gets enough weight, the hole goes where it should and the string stays out of trouble. Collar weight handles the push, stabilizers handle direction, and steering and measurement tools handle the fine control.
If you're learning this, start with the three classic layouts. Fulcrum builds, pendulum drops, packed holds. Once you can picture why each one bends the way it does, the rest of BHA design becomes a series of sensible trade-offs.